Blog Art
Welcome to this short guide. The basic configuration of Raycast Shader for the video test was done entirely by the talented dendewa, who published the necessary instructions and materials on their DeviantArt in 2021. I am attaching the link once again, as it is essential for this guide to be functional. Therefore, I will not mention anything about the instructions authored by him, other than a few slight modifications I made to some parts. I apologize in advance if the instructions are confusing or contain errors. Please comment if this happens through the means provided below.
Attention
Before we begin, I would like to make a few clarifications and warnings:
-
This is NOT a tutorial suitable for BEGINNERS. It will not explain: how to get started with Ray-MMD, how it works, how to hide objects in the MME tabs, how to add other effects to it, etc. The reason I emphasize this so much is because, if that were the case, everything mentioned here could confuse you and lead to frustration when things are not working properly.
The main purpose of this document is to share settings for some effects that, in addition to Raycast, I use in the rest of my videos to enhance the atmosphere or add finishing touches. If you have any questions about this or the dendewa tutorial (to the best of my ability), I will answer them through the video comments or through my deviantArt account notes. However, depending on the complexity of the questions, I may redirect you to other tutorials ^^
-
In his document, dendewa lists the minimum requirements for running the latest version of MMD, but not for the version of Ray-MMD used. My hardware specifications are as follows:
- Processor: Intel Core i9-12900HK
- RAM installed: 64 GB
- GPU: Intel Iris Xe
If your CPU is an i7, it is likely that you can run Raycast1.5.2 with (perhaps) some drops in FPS. And I know from experience that on i5 and i3 it IS possible to configure the shader satisfactorily, but the FPS will be very low and the limited capacity of the factory - integrated graphics cards will generate errors in the ray environment (some more noticeable than others, especially if you modify ray.conf). That said, I disclaim any responsibility for damage or failure resulting from ignoring the above technical warnings and the instructions in this guide.
Now, let's begin the tutorial!
Needed Resources
| Name | Link |
|---|---|
| Advanced Physical Lighting by dendewa (finished) | Link |
| Ray-mmd 1.5.2 肌色 5セット by MARUSU | Link |
| DigitalRipple by Beamman-P (optional) | Link |
| msColorCorrection_ver.1.0 by ましまし | Link |
| DD Lut Library 2.4 by dendewa | Link |
| msEdgeChroma_ver.1.1 ましまし | Link |
| ikBokeh by ikeno (optional) | Link |
| ikCinemorph by ikeno (optional) | Link |
| LightBloom by Rui (optional) | Link |
Before Starting
The effects marked as optional in the previous section were designated as such because they do not significantly affect the color balance and saturation of the final image. However, they do have the great advantage of adding a more elaborate touch.
You will need to load the ikClut suggested in Advanced Physical Lighting for best results, without modifying values in Accessory Manipulation. If you add a scene, the shadows in the TDA model (or any other) will not look the same as in the sample video. If you want to make a more polished projectby adding a stage, you will need to modify the positions of the lights and/or manipulate how shadows affect the model in the tabs of the MME window dow (SSAO, PSSM, ShadowMap).
Now, the first major deviation we're going to have from Advanced Physical Lightingis the skin.
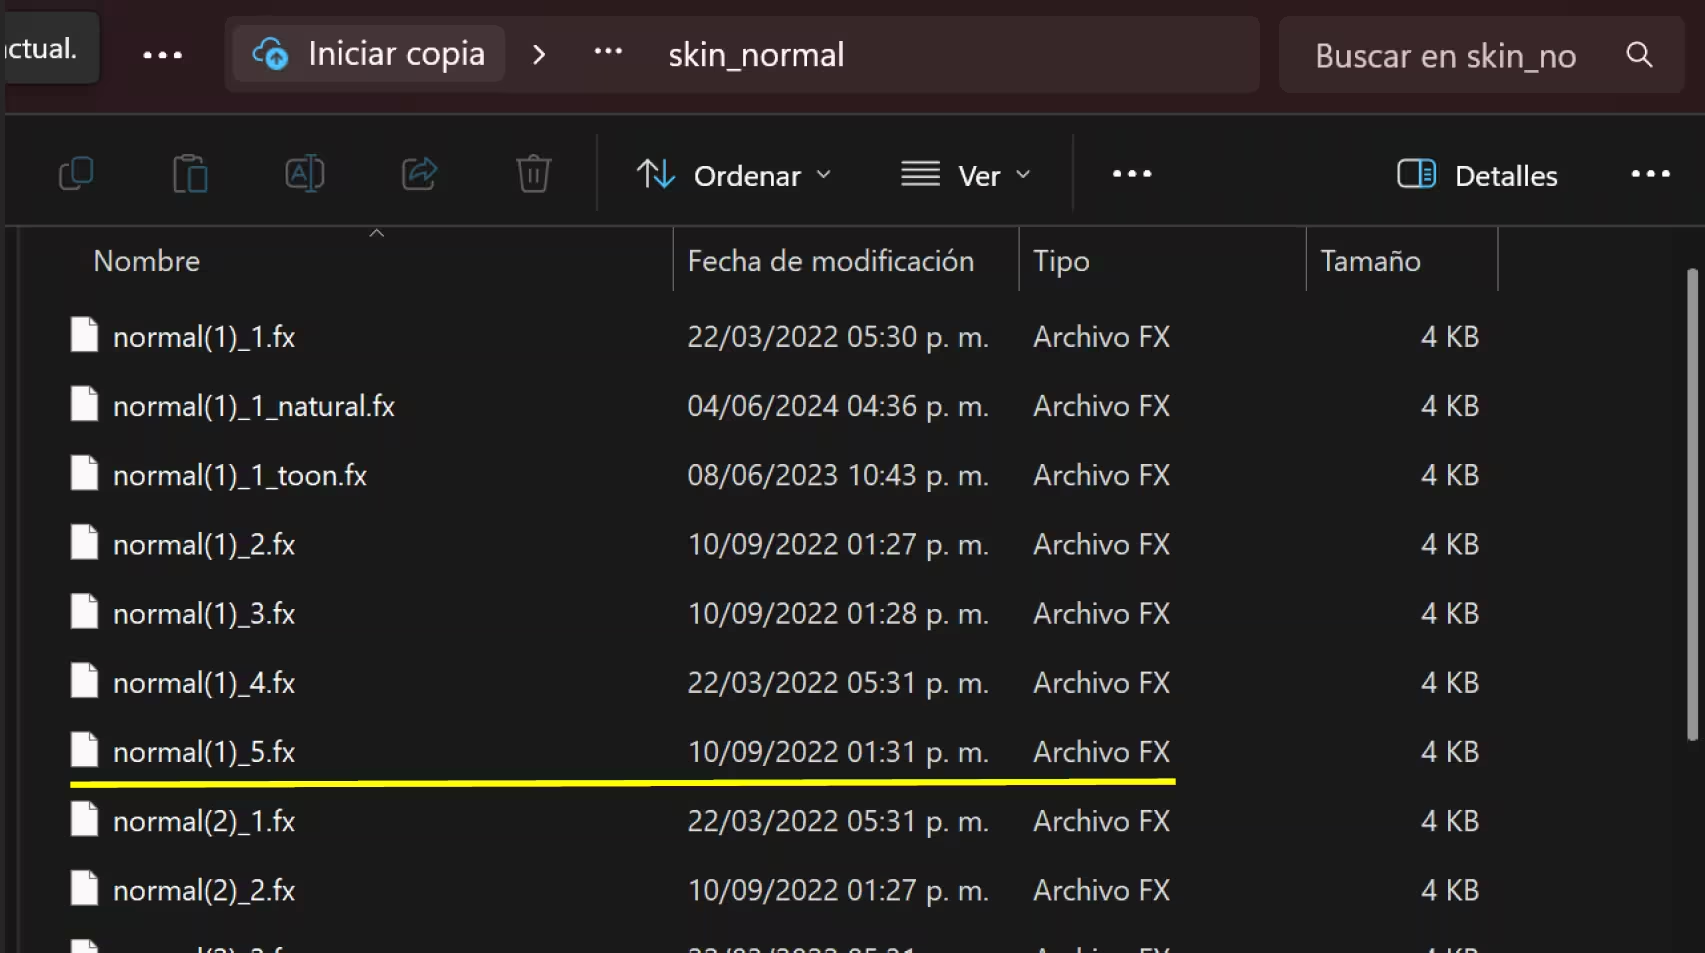
Load the MARUSU skin material onto your model. You can use any of the ones available in the
skin_normal folder to achieve the tone you want (especially the variations named normal(#)_5
look pretty good with the lighting we're going to create), but if you want to apply the specific .fx
shown in the video, it is the following:
The second major deviation from Advanced Physical Lighting is that we will include a
VolumetricSphere.pmx from ray-mmd-1.5.2 -> Fog to add dynamism to camera zooms in and out
(as well as darkening the atmosphere in general). To program it, simply move these sliders:
| Name | Value |
|---|---|
| Range+ | 1.0000 |
| Intensity- | 0.6400 |
Step 1: Replace ray.conf
If you don't feel comfortable completely replacing your ray.conf with the one provided in this
tutorial, create a backup copy and name it so that the script doesn't confuse it with the new
version (e.g., ray_copseg.conf). Once done, copy and paste the new file into the Ray -MMD main
folder. If you have successfully completed this step, the image on your screen should look
something like this:
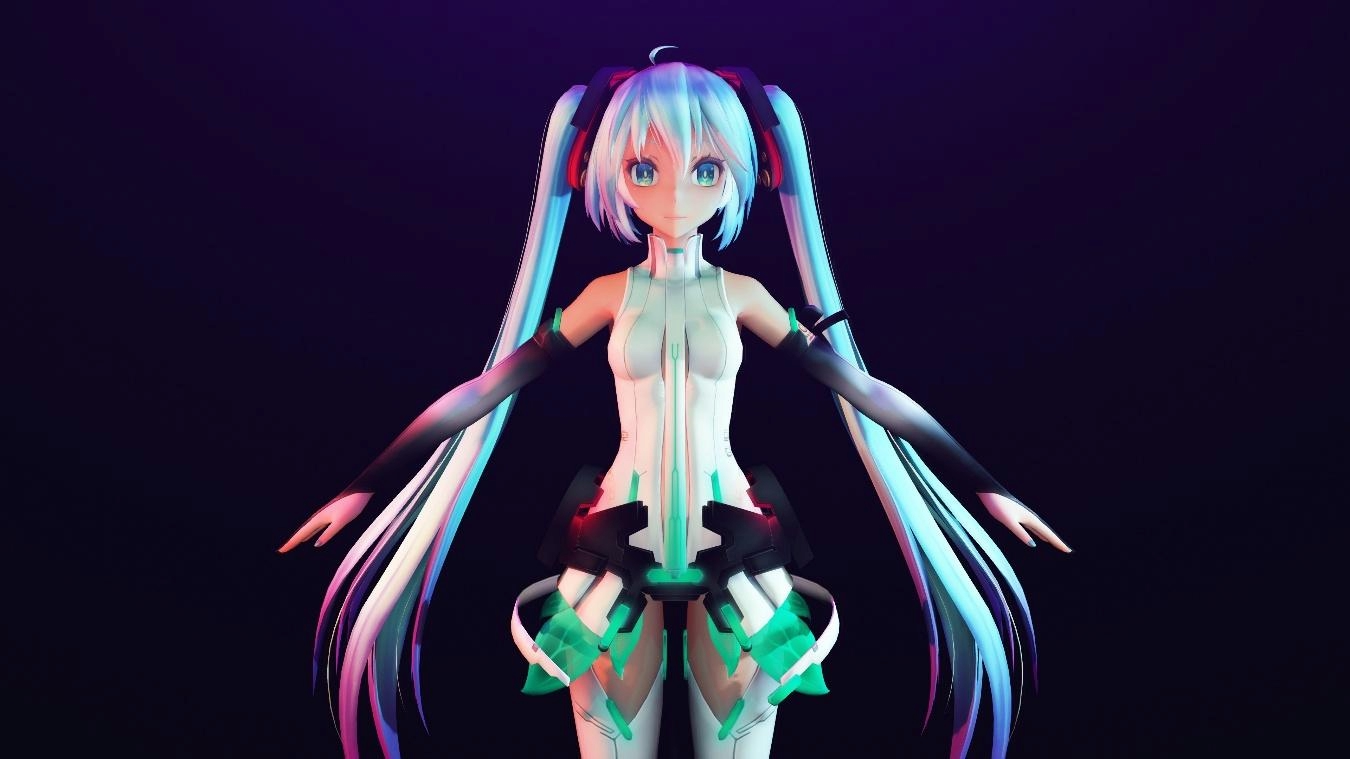
This step is crucial to ensure the similarity of the results presented.
Step 2: Modify ray_controller.pmx values
Modify the values of the following sliders in ray_controller.pmx:
| Name | Value |
|---|---|
| Temperature- | 0.2300 |
| BloomThreshold | 0.4570 |
| BloomStarFade | 1.000 |
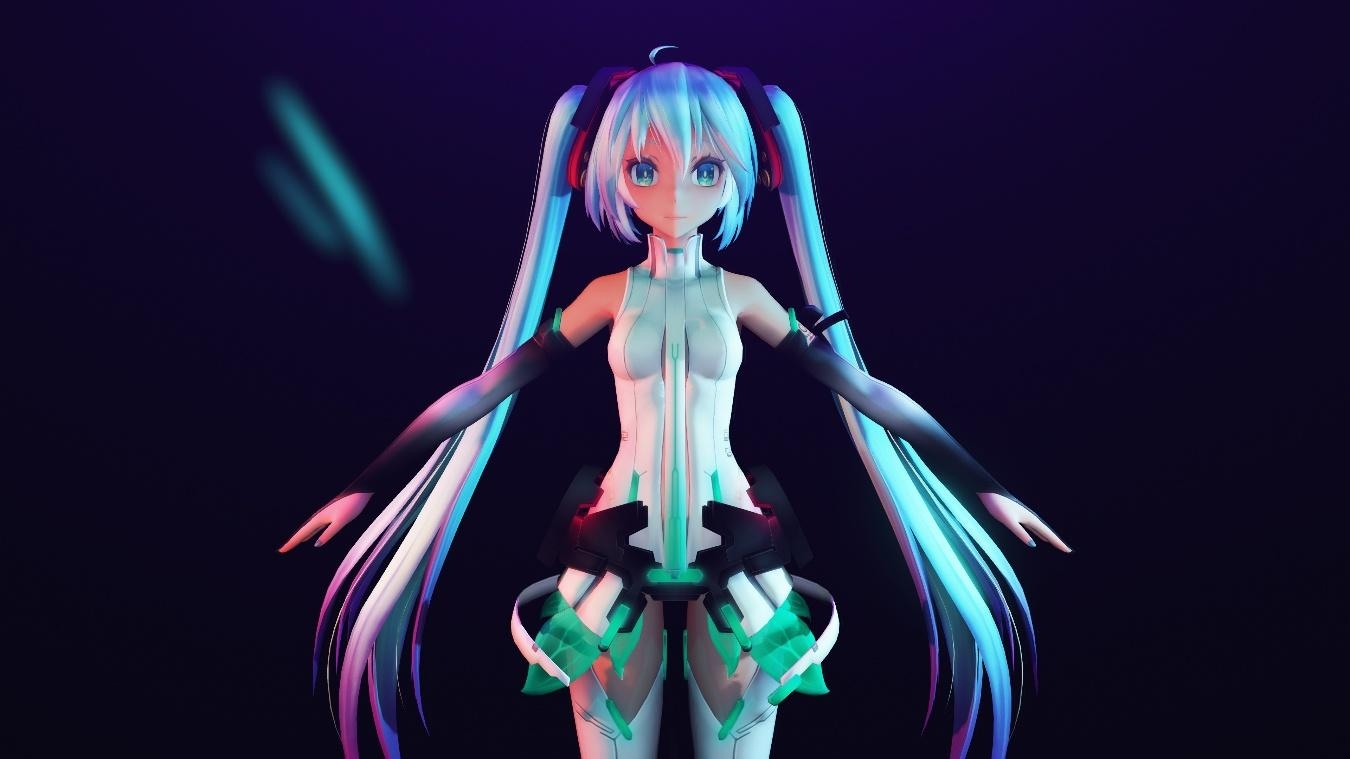
As a result, your screen should look something like this:
Step 3: Digital Ripple (OPTIONAL)
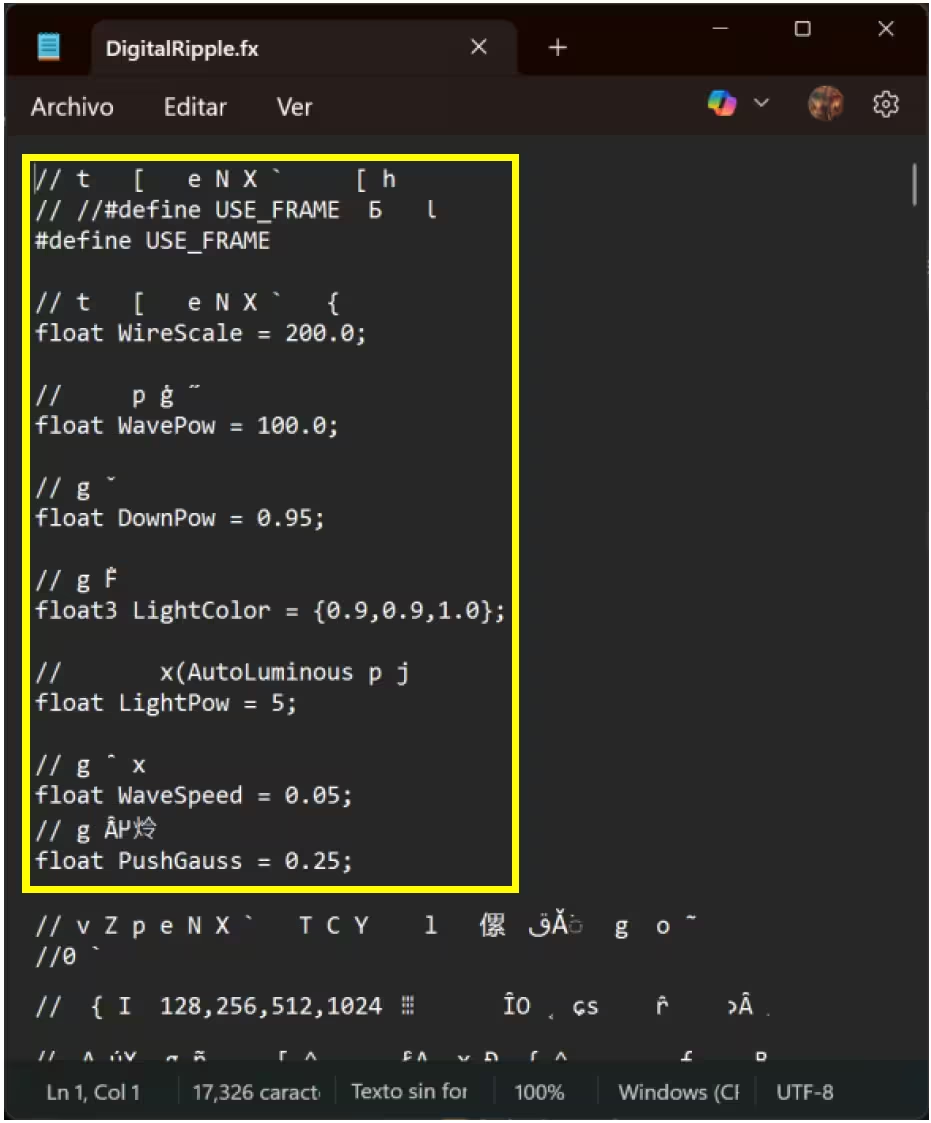
Load DigitalRipple.x and open DigitalRipple.fx in your preferred noteeditorapplication. Modify
the values in the file highlighted by the box:
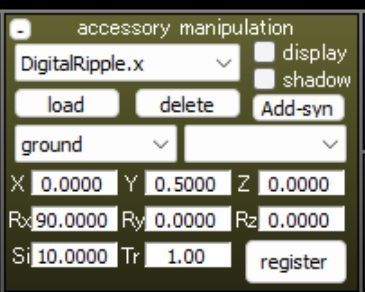
In Accessory Manipulation, enter the following values for DigitalRipple.x (imagine that the
display is ticked lol):
Step 4: msColorCorrection
msColorCorrection is one of my favorite effects to use with Raycast, as it allows you to modify
reflections and black and white balance without having to mess with the advanced ray settings.
However, today we are only going to use the Contrast slider. Why load this effect if ray_controller
can already do that? Simple: the latter affects the global Ray-MMD environment (i.e., it affects
the calculation of parameters), while the effect in this step applies a “filter” that better
preserves shadow depth (i.e., t he calculation of parameters is maintained and
msColorCorrection is equivalent to post-production editing).
Before configuring the effect, it is necessary to mention that the .pmx controls for
msColorCorrection and msEdgeChroma ARE NOT TRANSLATED INTO ENGLISH. In other words,
this means that when you load msColorCorrectionController.pmx in MMD's English mode, you
will see this:
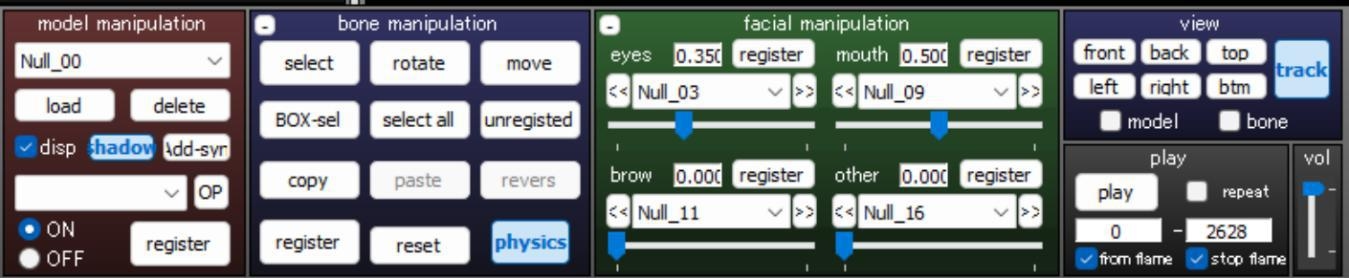
Please follow these steps carefully if you are unfamiliar with the effect, and if when you change
the program language to Japanese, instead of Null_03, コントラスト.5 does not appear:
-
Load
msColorCorrection.xand do not modify it in the accessories tab. -
Load
msColorCorrectionController.pmx. In English, it will appear under the nameNull_00in the Model Manipulation tab. -
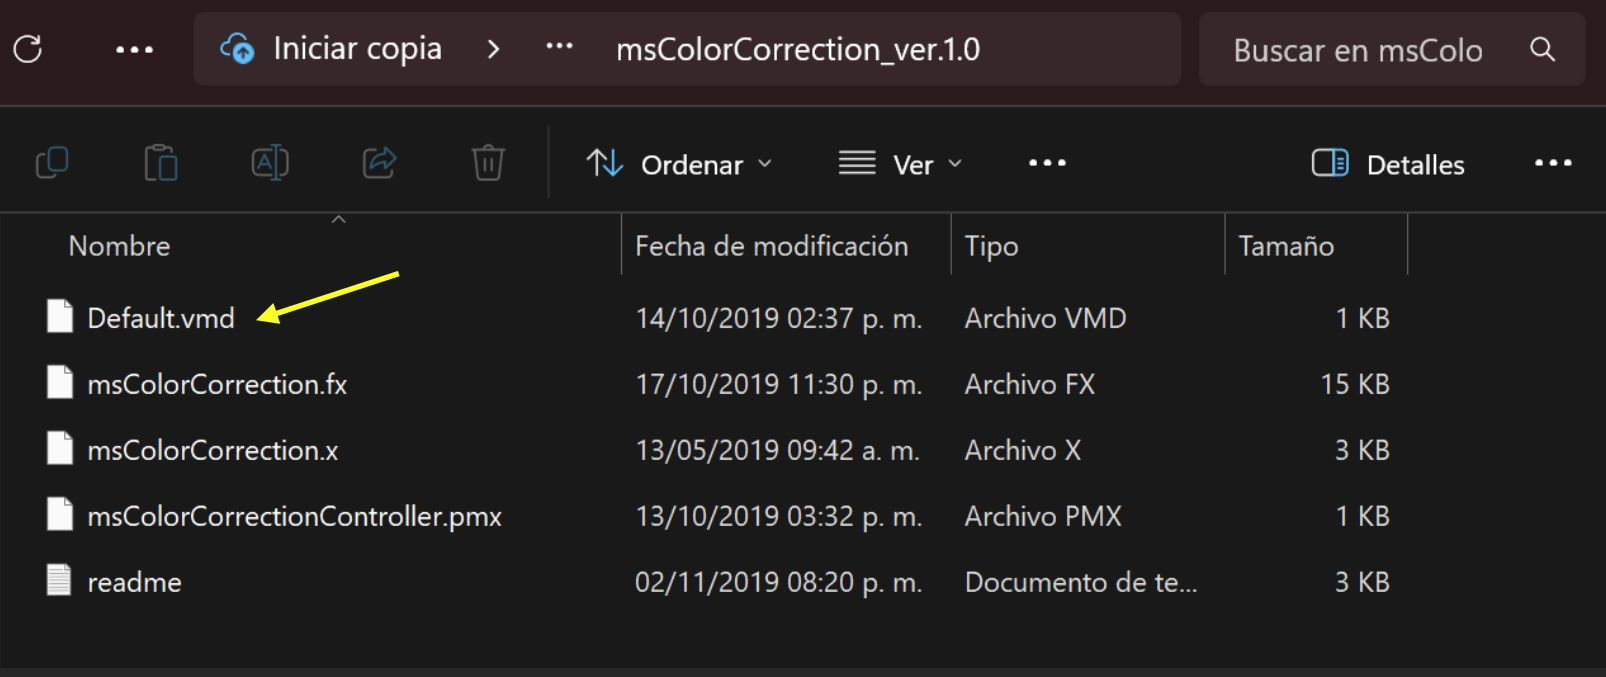
Immediately, load the
Default.vmdmotion file, which is included in the effect folder.
-
As shown in the MMD tab image at the beginning of this section, go to
Facial Manipulation -> Eyes -> ‘Null_03’/' コントラスト.5'and set the slider to 0.3500. -
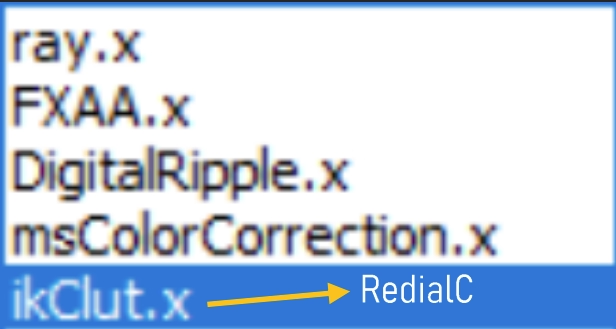
Change the order of your accessories so that it looks like this:
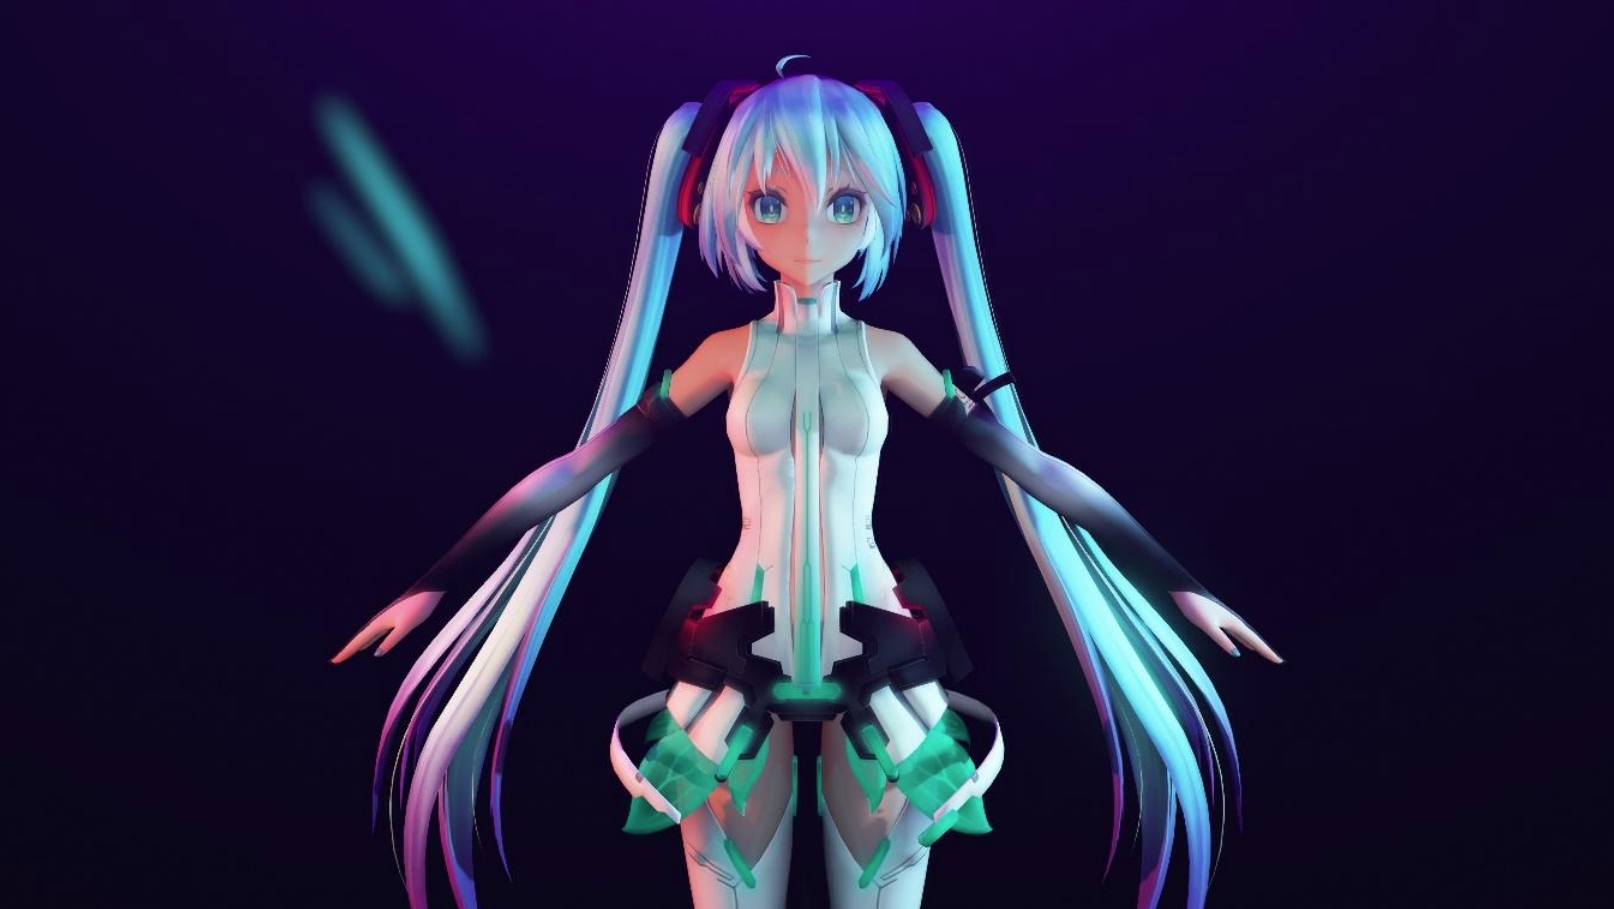
Now, your render should have a slightly more muted/matte look:
Step 5: DD Lut Library 2.4 (Strong_Curve&DD_Cinematic)
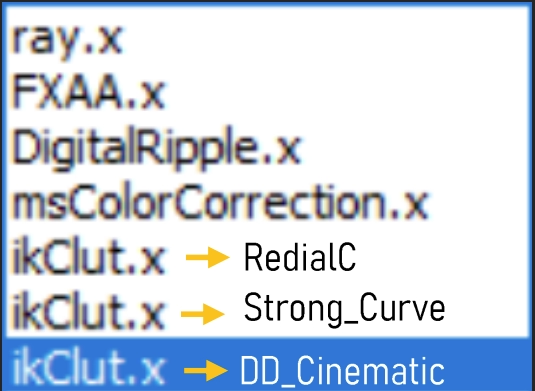
In this step, we will add two modified ikClutsfrom the same library. It is important that you load them in the order indicated.
- Open
DDLL2.0 -> Luminance -> Strong_Curve -> ikClut.x. Load it into your project and modify:
| Name | Value |
|---|---|
| Tr | 0.2000 |
- Open
DDLL2.0 -> RGB -> DD_Cinematic -> ikClut.x. Load it into your project and modify:
| Name | Value |
|---|---|
| Tr | 0.4000 |
Your list of accessories should now have 3 ikCluts in a row.
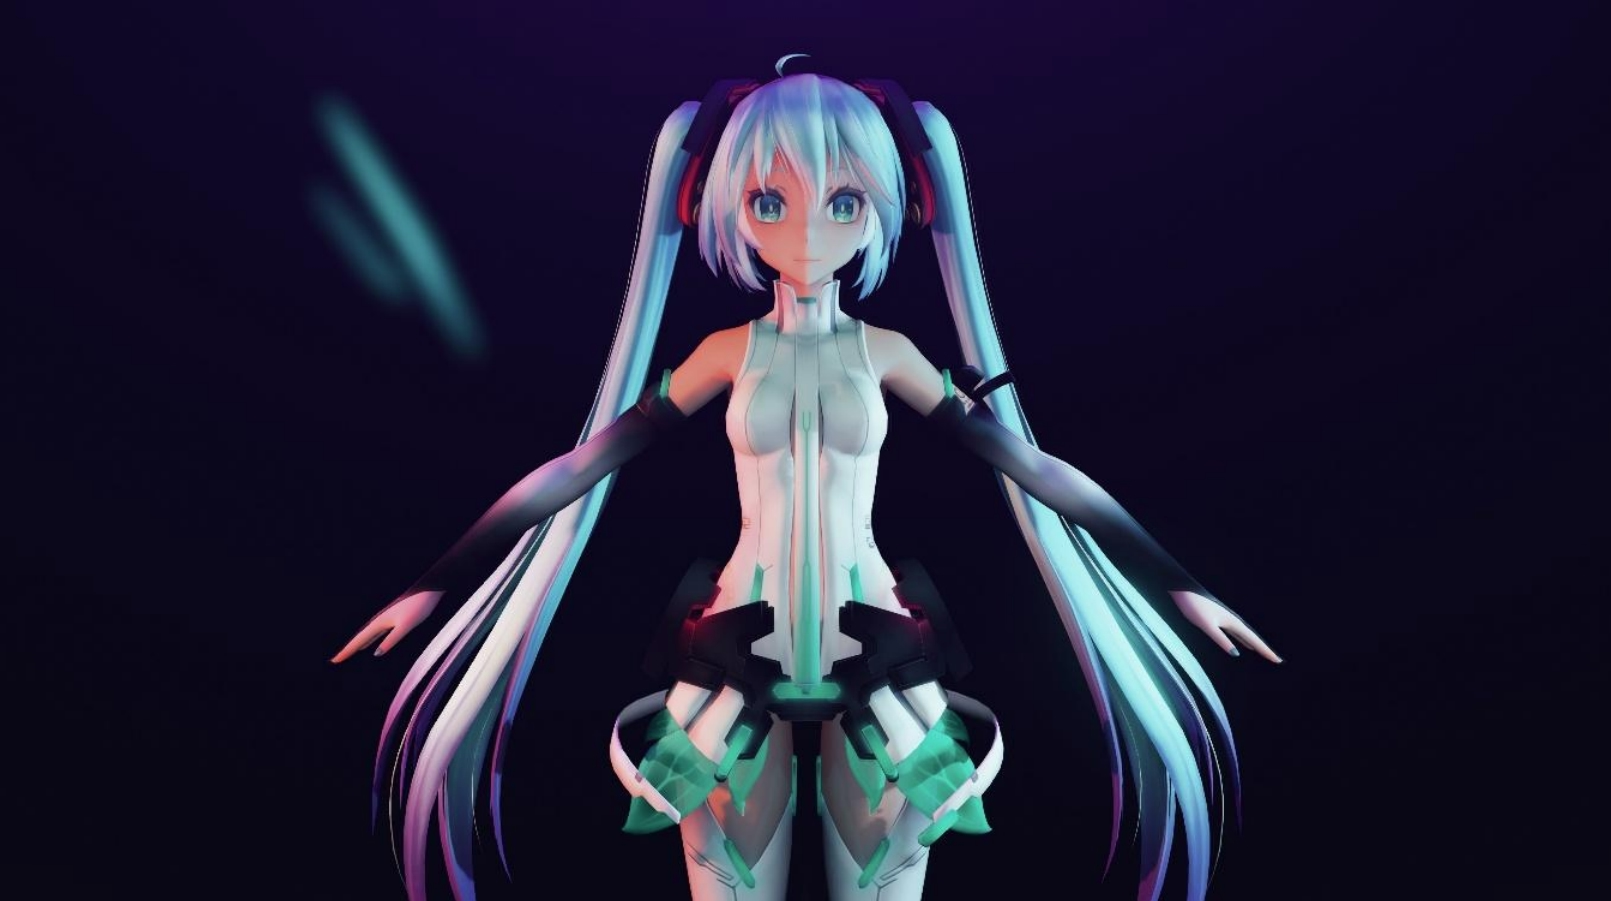
Example of how your render should look now:
Step 6: msEdgeChroma
My favorite Mashimashieffect. As its name suggests, it gives your models a chromatic effect on the edges, plus 5 other parameters to modify how it is presented. Below, I will leave a fairly obvious example of its use.
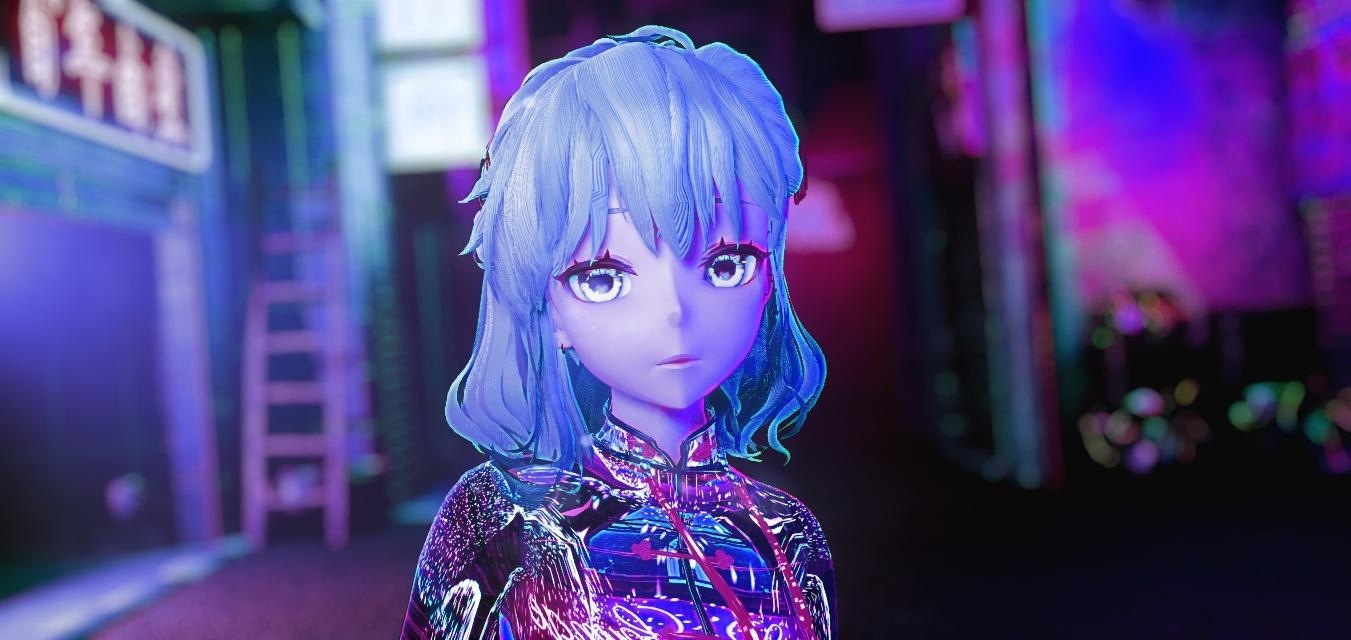
To load it, follow the same procedure as for msColorCorrection, except that now you won't need
to load any motion files or move the sliders individually... Because EdgeChroma uses bones to
control it. When you load msEdgeChromaController.pmx, it will also appear with the name
Null_00 and you will need to display all its bones in Bone/Frame Manipulation. If you can switch
to Japanese mode, you can skip the image; if not, these are the actual names of the bones:
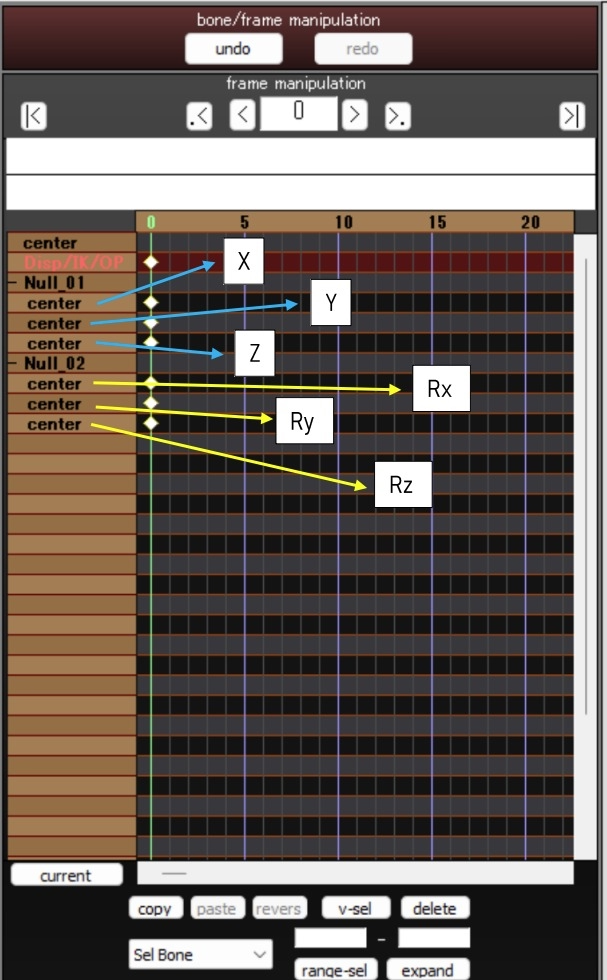
Once identified, write these values on the indicated bone:
| Name | X | Y | Z |
|---|---|---|---|
| Bone X | 50.00 | 0.00 | 0.00 |
| Bone Y | 20.00 | 0.00 | 0.00 |
| Bone Z | 50.00 | 0.00 | 0.00 |
| Bone Ry | 100.00 | 0.00 | 0.00 |
| Bone Rz | -50.00 | 0.00 | 0.00 |
And voilà! At this point in the tutorial, you already have a render that is essentially the same as the sample video. All you need to do is add your usual textures in MaterialMap and have fun experimenting with all the effects (or even adding your own) UwU
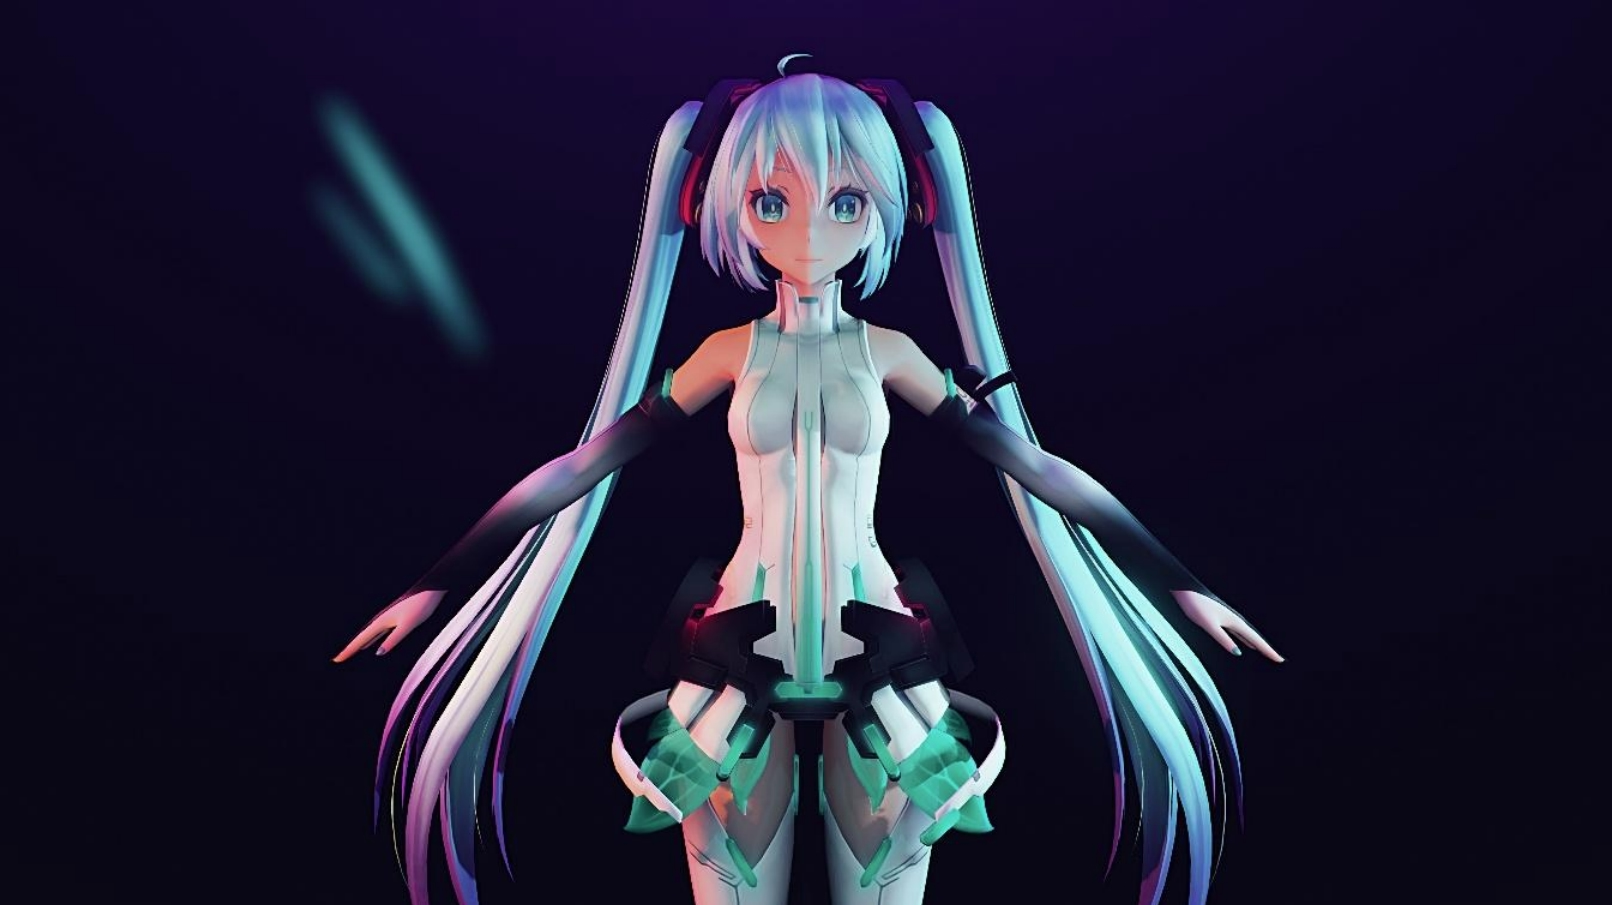
P.S.: The before and after of some parameters (such as Rz) are more noticeable when you have your models with textures (Raycast materials). If you want the chromatic effect to be more noticeable from a distance, set the X bone value to greater than 100.00 or less than -100.00 (negative numbers change the colors of the chromaticism!).
Step 7: ikBokeh (OPTIONAL)
In my case, I like to “parent” ikBokeh.x to the bone of the head of the model I am using, so that
the head and part of the torso are never out of focus. Whether you do this or not is up to you, but
I cannot guarantee that it will focus correctly with the values I give he
The values you will enter in ikBokehController.pmx are:
| Name | Value |
|---|---|
| Focus Range | 0.1500 |
| Bokeh+ | 0.2600 |
| Front Bokeh- | 0.7900 |
| CoC Size | 0.5000 |
| Emphasize | 0.4000 |
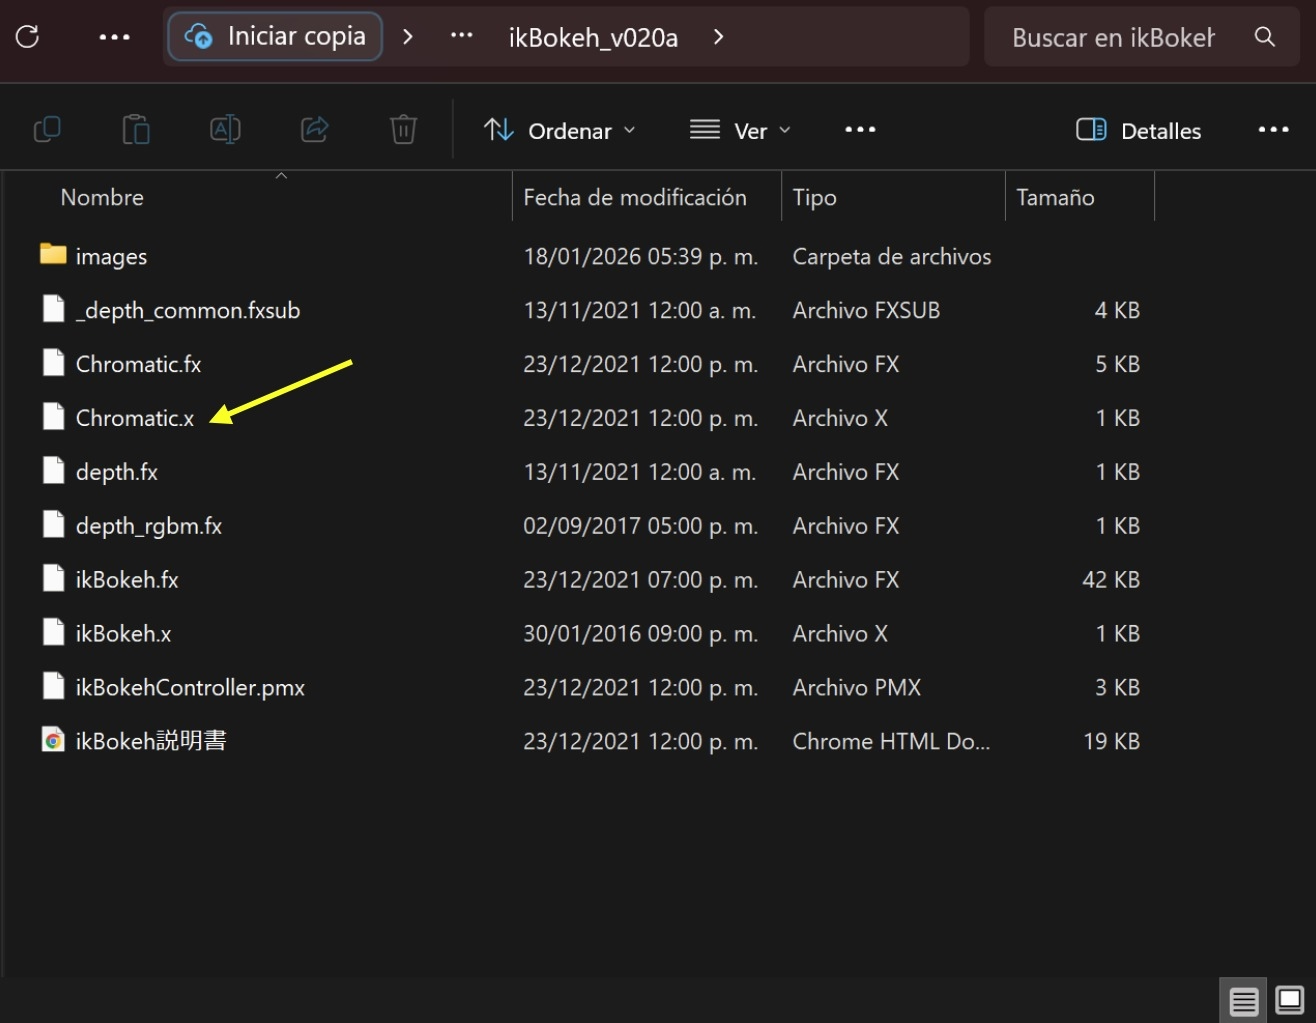
Load Chromatic.x from the ikBokeh folder and set Tr = 0.70
Step 8: ikCinemorph (OPTIONAL)
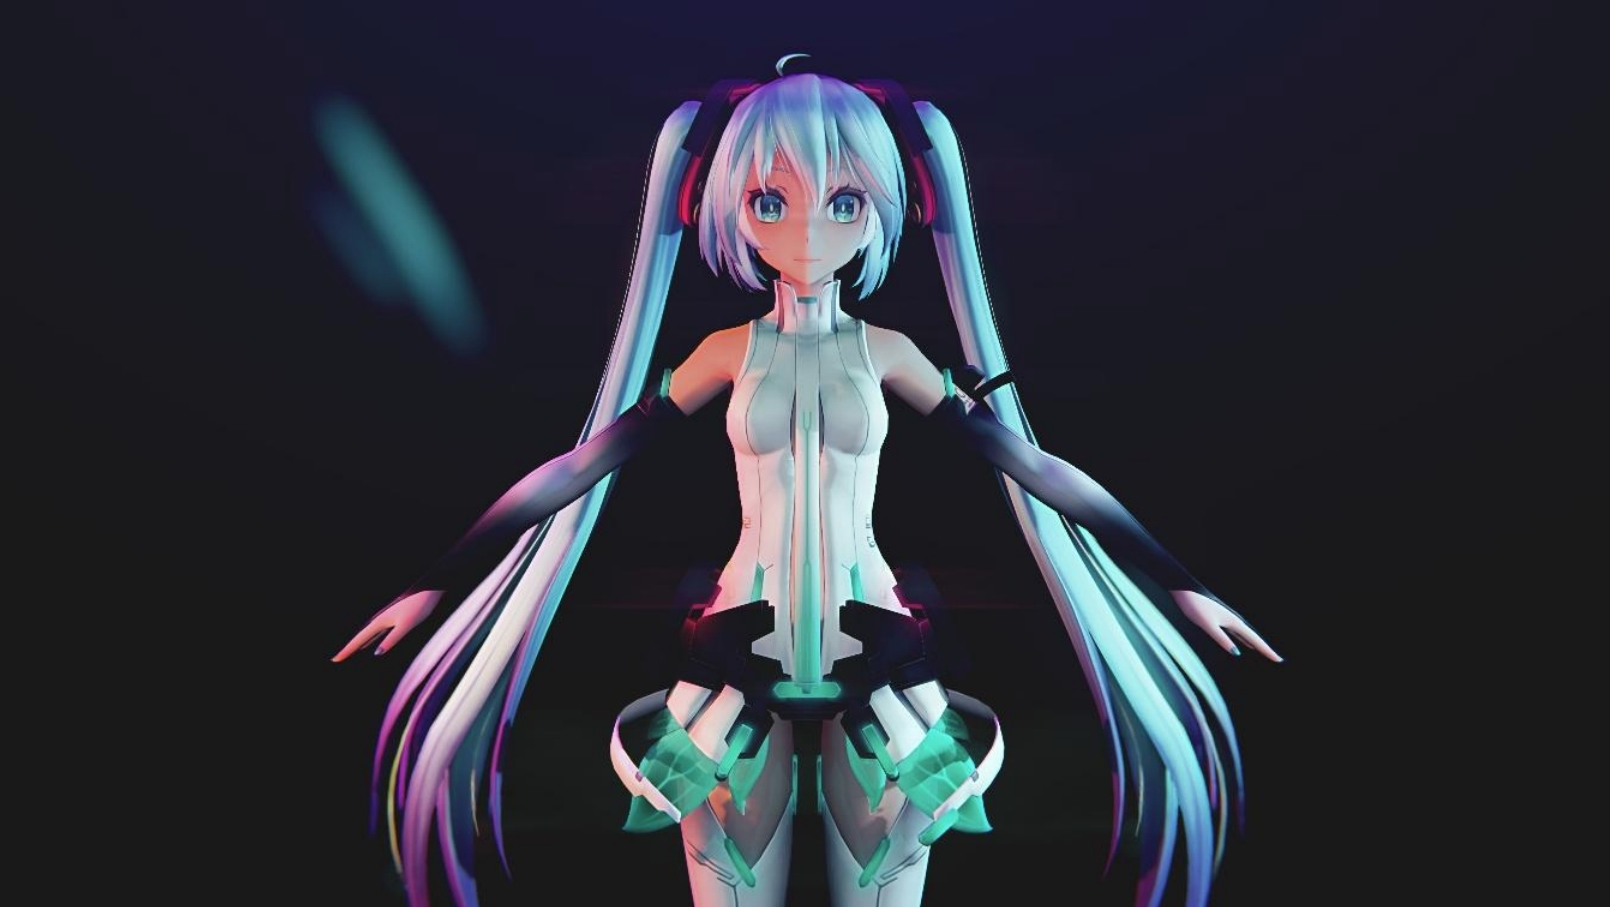
Finally, we arrive at an effect that doesn't have much behind it, it just follows the image.
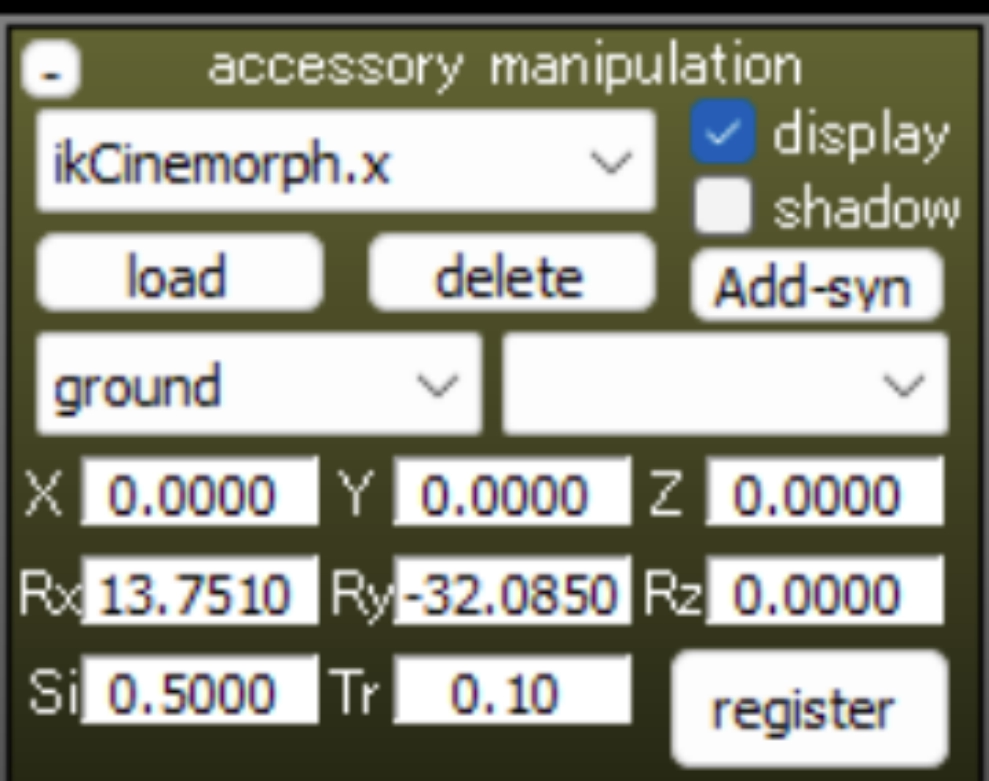
To change the brightness intensity, modify the Tr parameter.
Step 9: LightBloom (OPTIONAL)
What sets LightBloom apart from ray_controller's BloomThreshold and other old favorites like
AutoLuminous is that it includes the option to simulate dust particles stuck to the “camera” lens,
as you can see in the image.
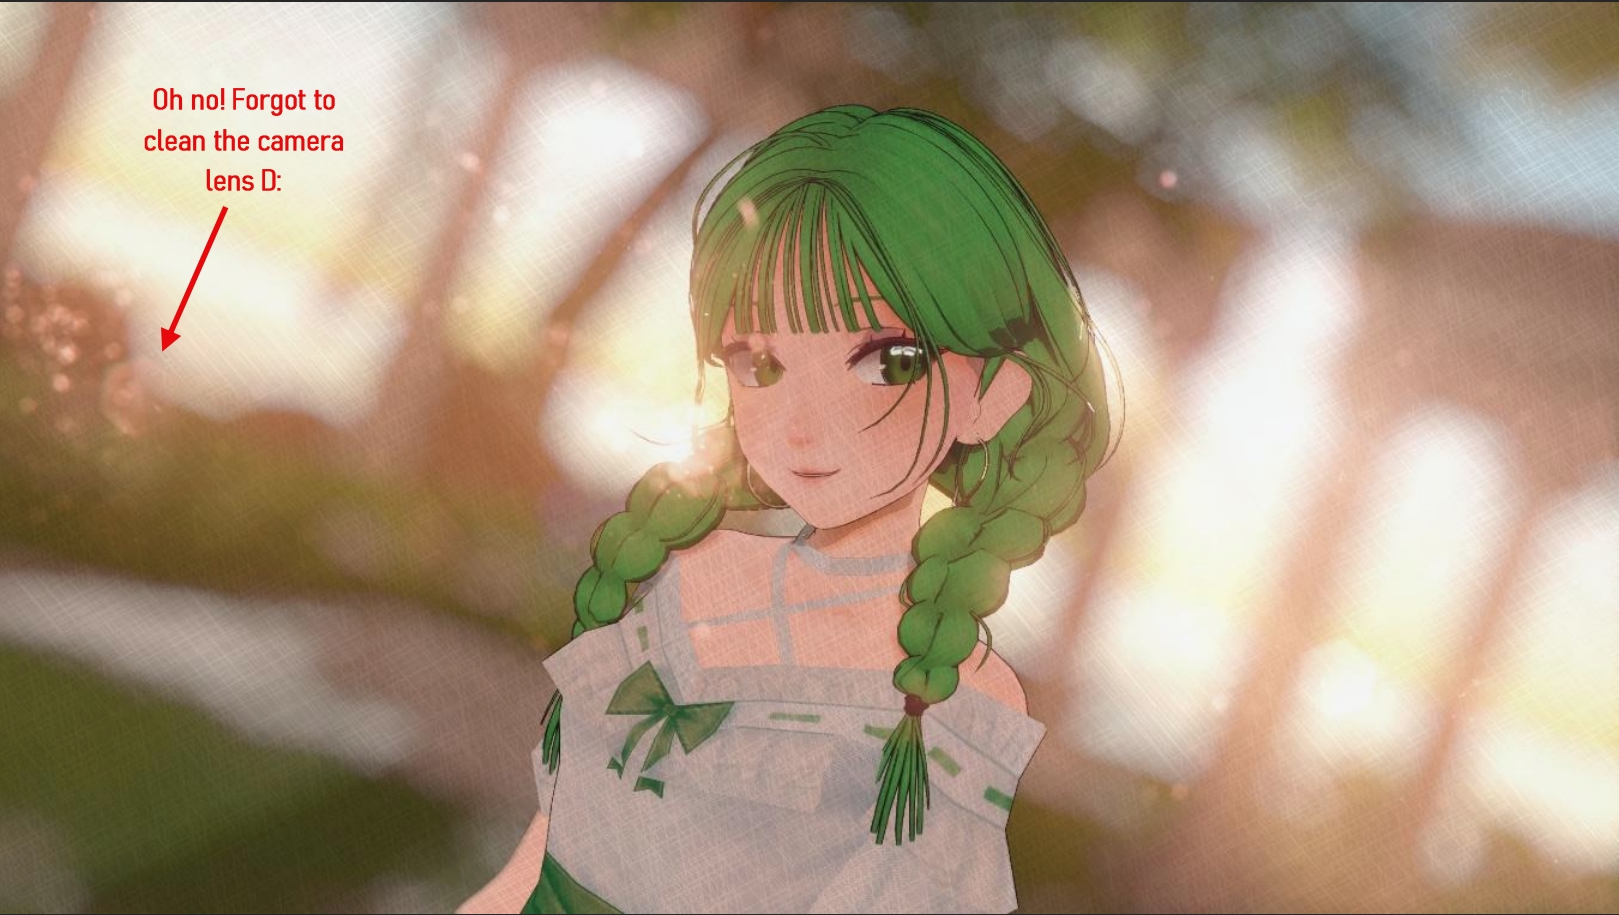
It works especially well for giving an ethereal or realistic touch (depending on the context) to an image or video. I personally use it a lot for sunset lighting, which is when the light hypothetically hits the camera lens directly. The other advantage of this effect, and I'm not kidding, is that it has many sliders to modify the brightness level and color by depth. In other words, it's quite customizable.
To program it, you first need to load LightBloom with Dirt Map.x and LightBloomController.pmx
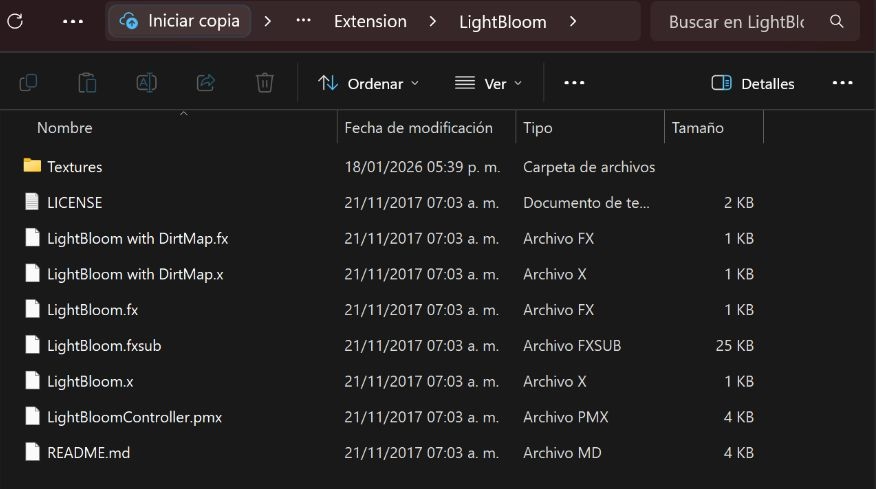
And finally, set the sliders to the following positions:
| Name | Value |
|---|---|
| Bloom Threshold | 0.4500 |
| BloomColor AllH+ | 0.7500 |
| BloomColor AllS+ | 0.1900 |
| DirtColorH+ | 0.4000 |
| DirtColorS+ | 0.2800 |
| DirtColorV+ | 0.3500 |
| BloomColor 1stV- | 1.0000 |
| BloomColor 2stV- | 0.4700 |
| BloomColor 3stH+ | 0.4900 |
| BloomColor 3stS+ | 0.7000 |
| BloomColor 3stV- | 0.8100 |
| BloomColor 5stV- | 1.0000 |
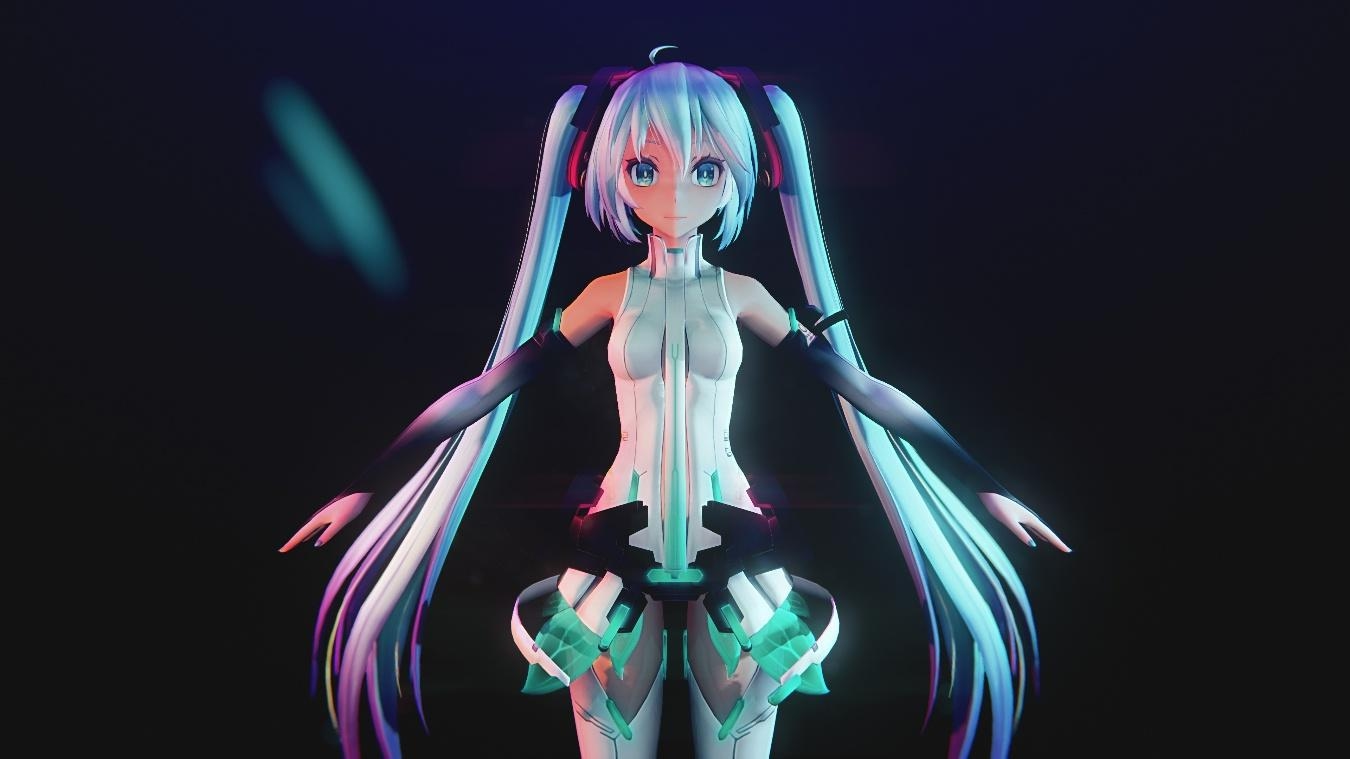
Now, this is the end of the guide! I hope you enjoyed it, found it helpful, and are looking forward to the next one.
With love, Lise.
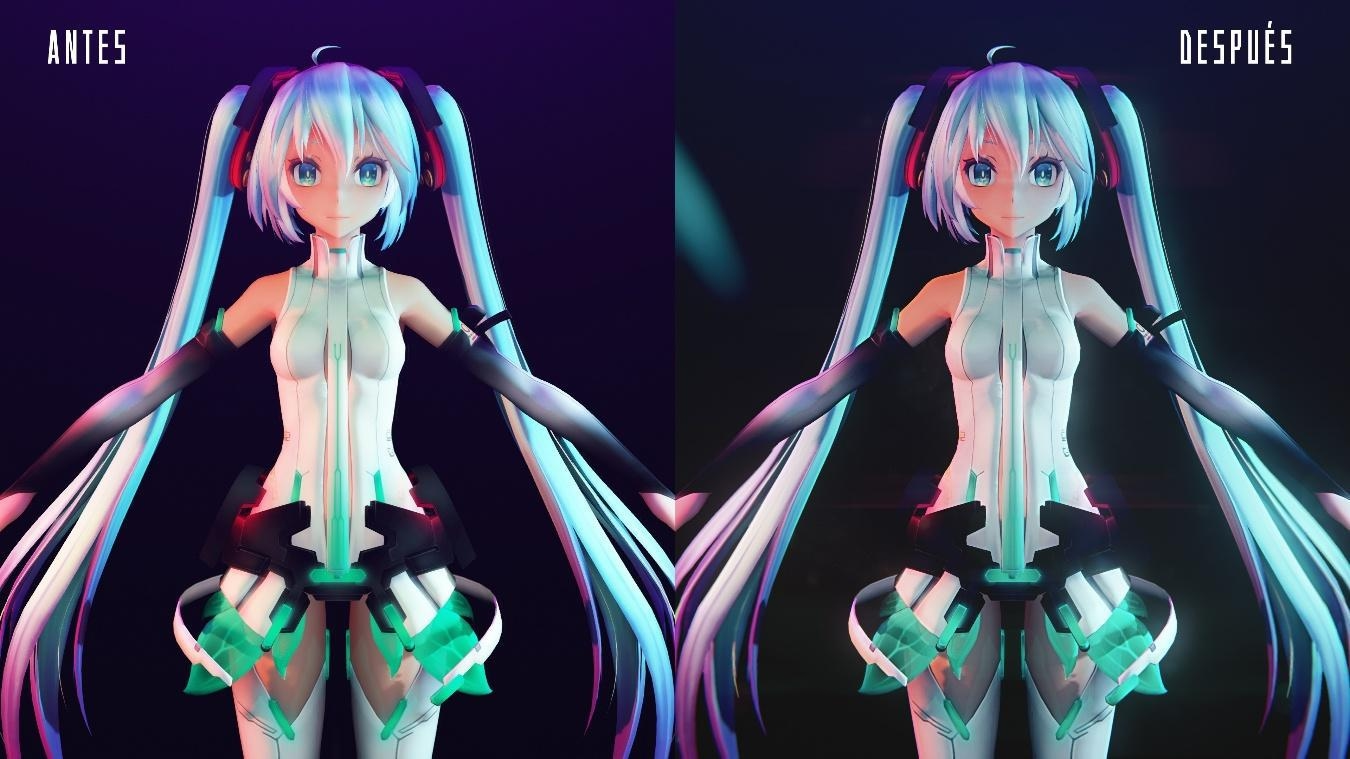
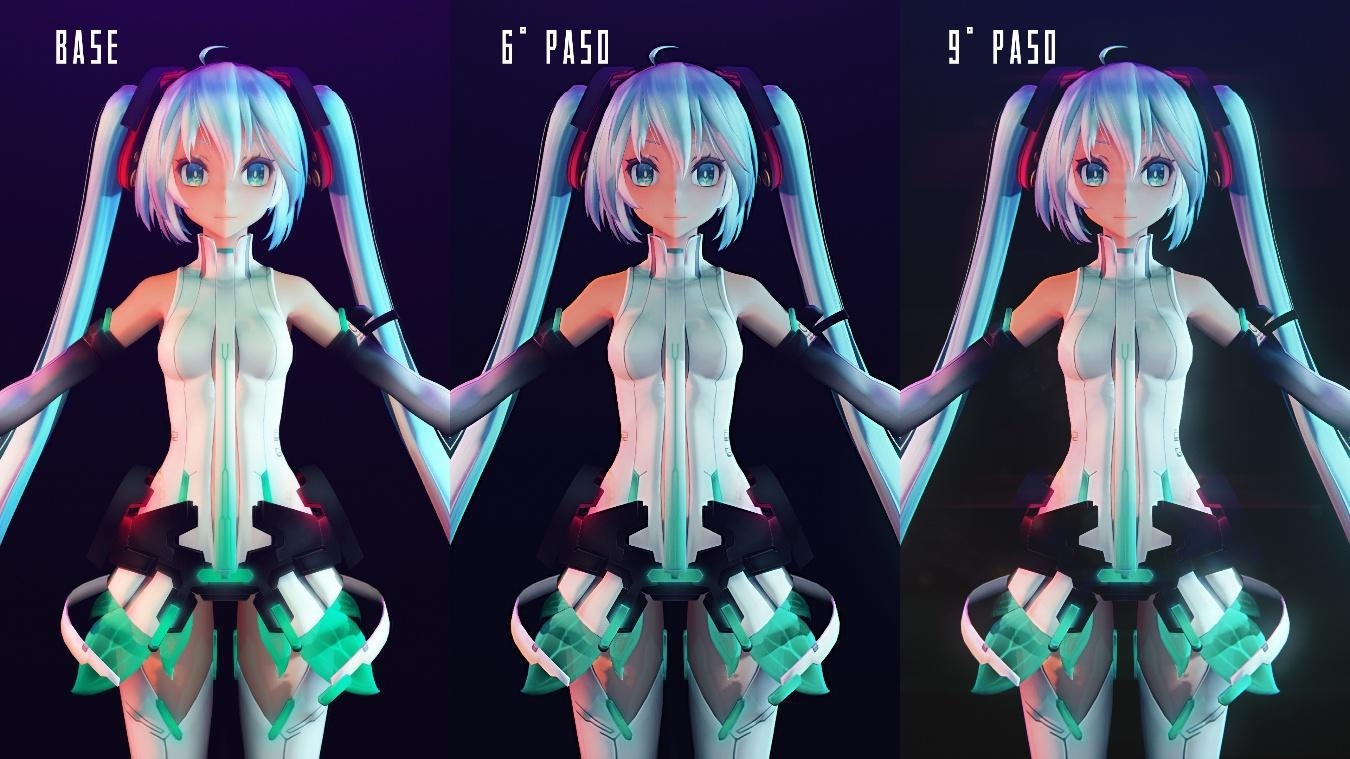
APENDIX: Graphic comparison
On this page
- Attention
- Needed Resources
- Before Starting
- Step 1: Replace ray.conf
- Step 2: Modify ray_controller.pmx values
- Step 3: Digital Ripple (Optional)
- Step 4: msColorCorrection
- Step 5: DD Lut Library 2.4 (Strong_Curve & DD_Cinematic)
- Step 6: msEdgeChroma
- Step 7: ikBokeh (Optional)
- Step 8: ikCinemorph (Optional)
- Step 9: LightBloom (Optional)
- Appendix: Graphic Comparison
Explore DENDEWA LAB latest projects and innovations. Join us and grow together.